As we know, enamels need settings to protect them from clumsy artists. However, settings can take a great deal of time to fabricate, particularly if you tend towards the baroque or complex mechanisms. So, for a while now I've been thinking about interchangeable parts and casting onto armatures. Well, it is starting to happen. For all the time I spent looking into dies for the enamel blanks, it turns out I ended up simply getting the pre-cut shape (30x40mm domed oval copper) from people who specialize in that kind of thing.
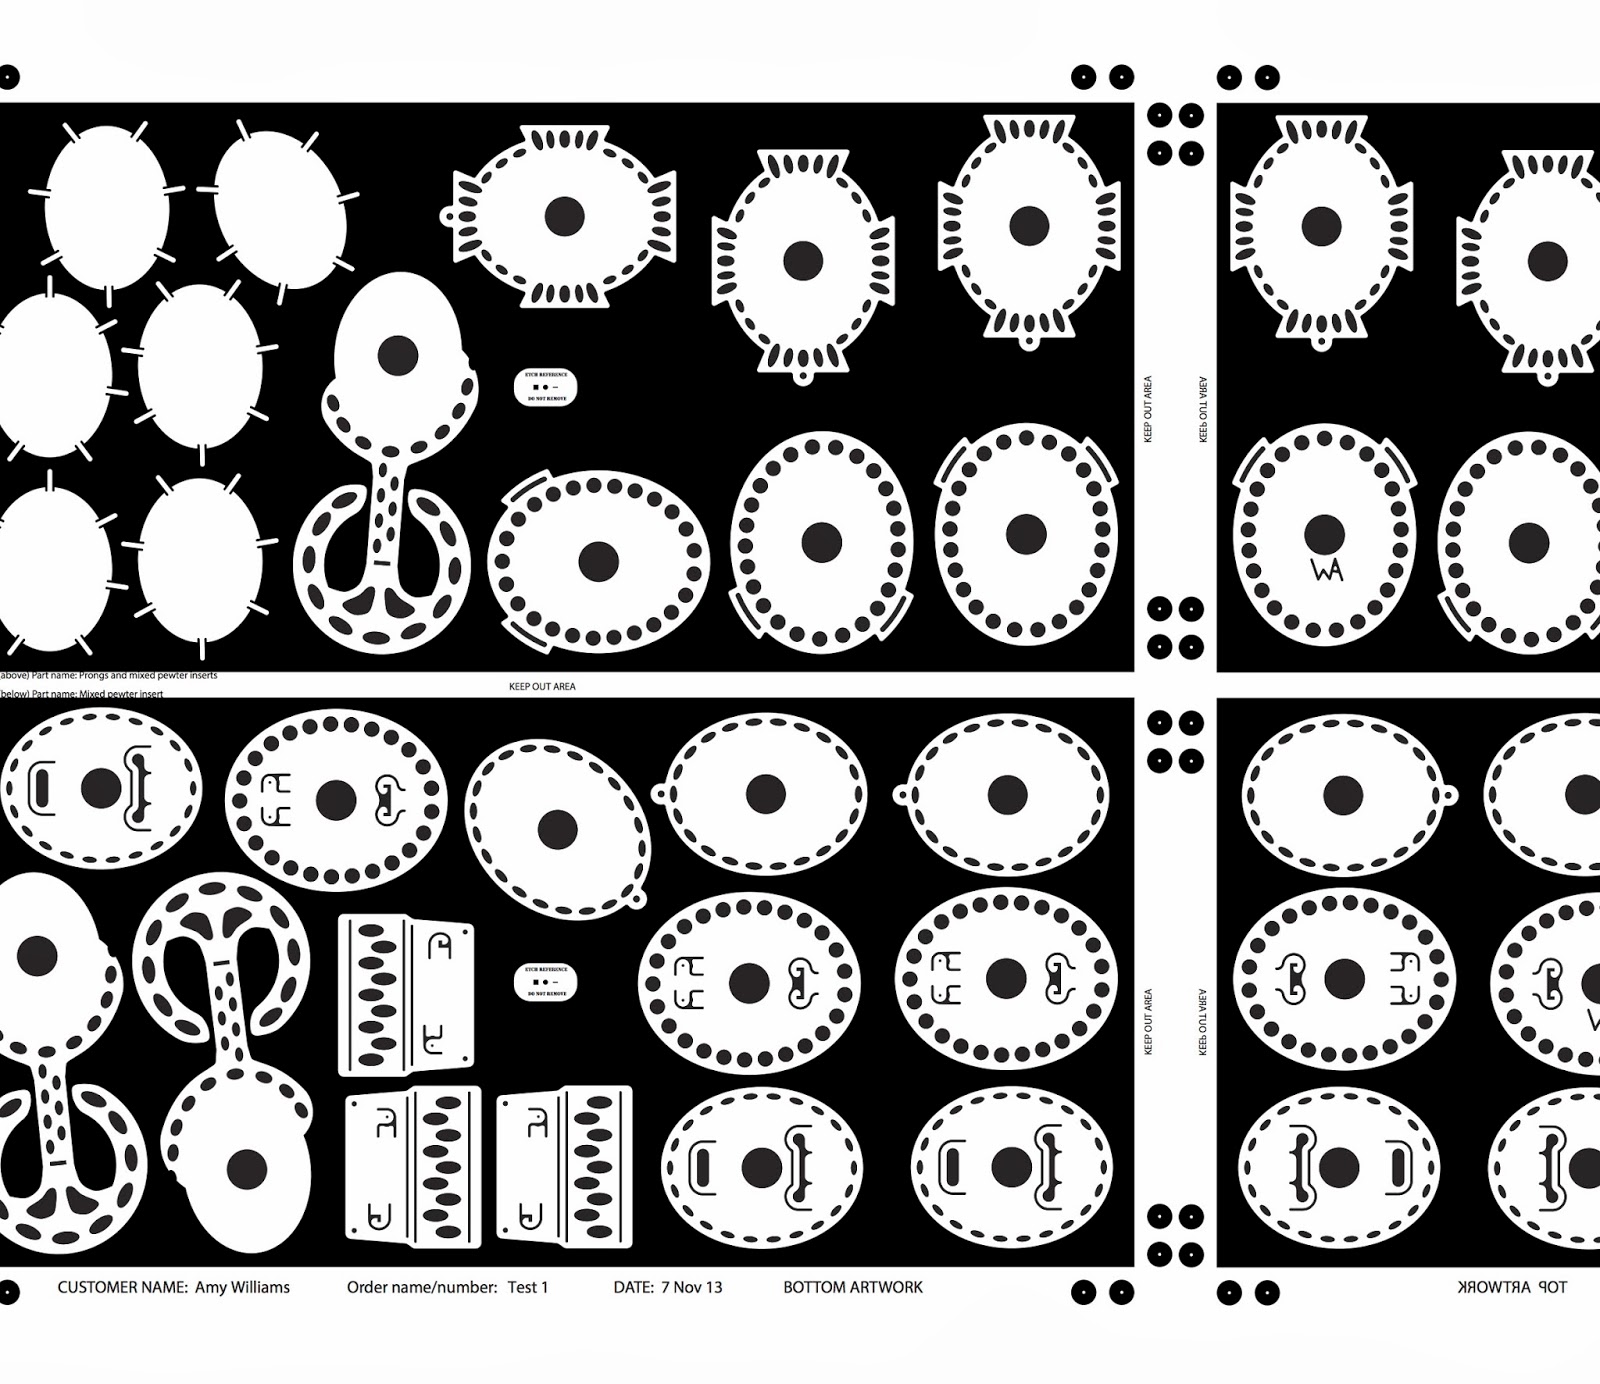
That said, I am still getting my machine on by designing a ton of custom shapes to be cut from the 430 stainless steel. I shaped the forms using 3-D modeling software and then exported them into a vector program so that they could be laser cut.

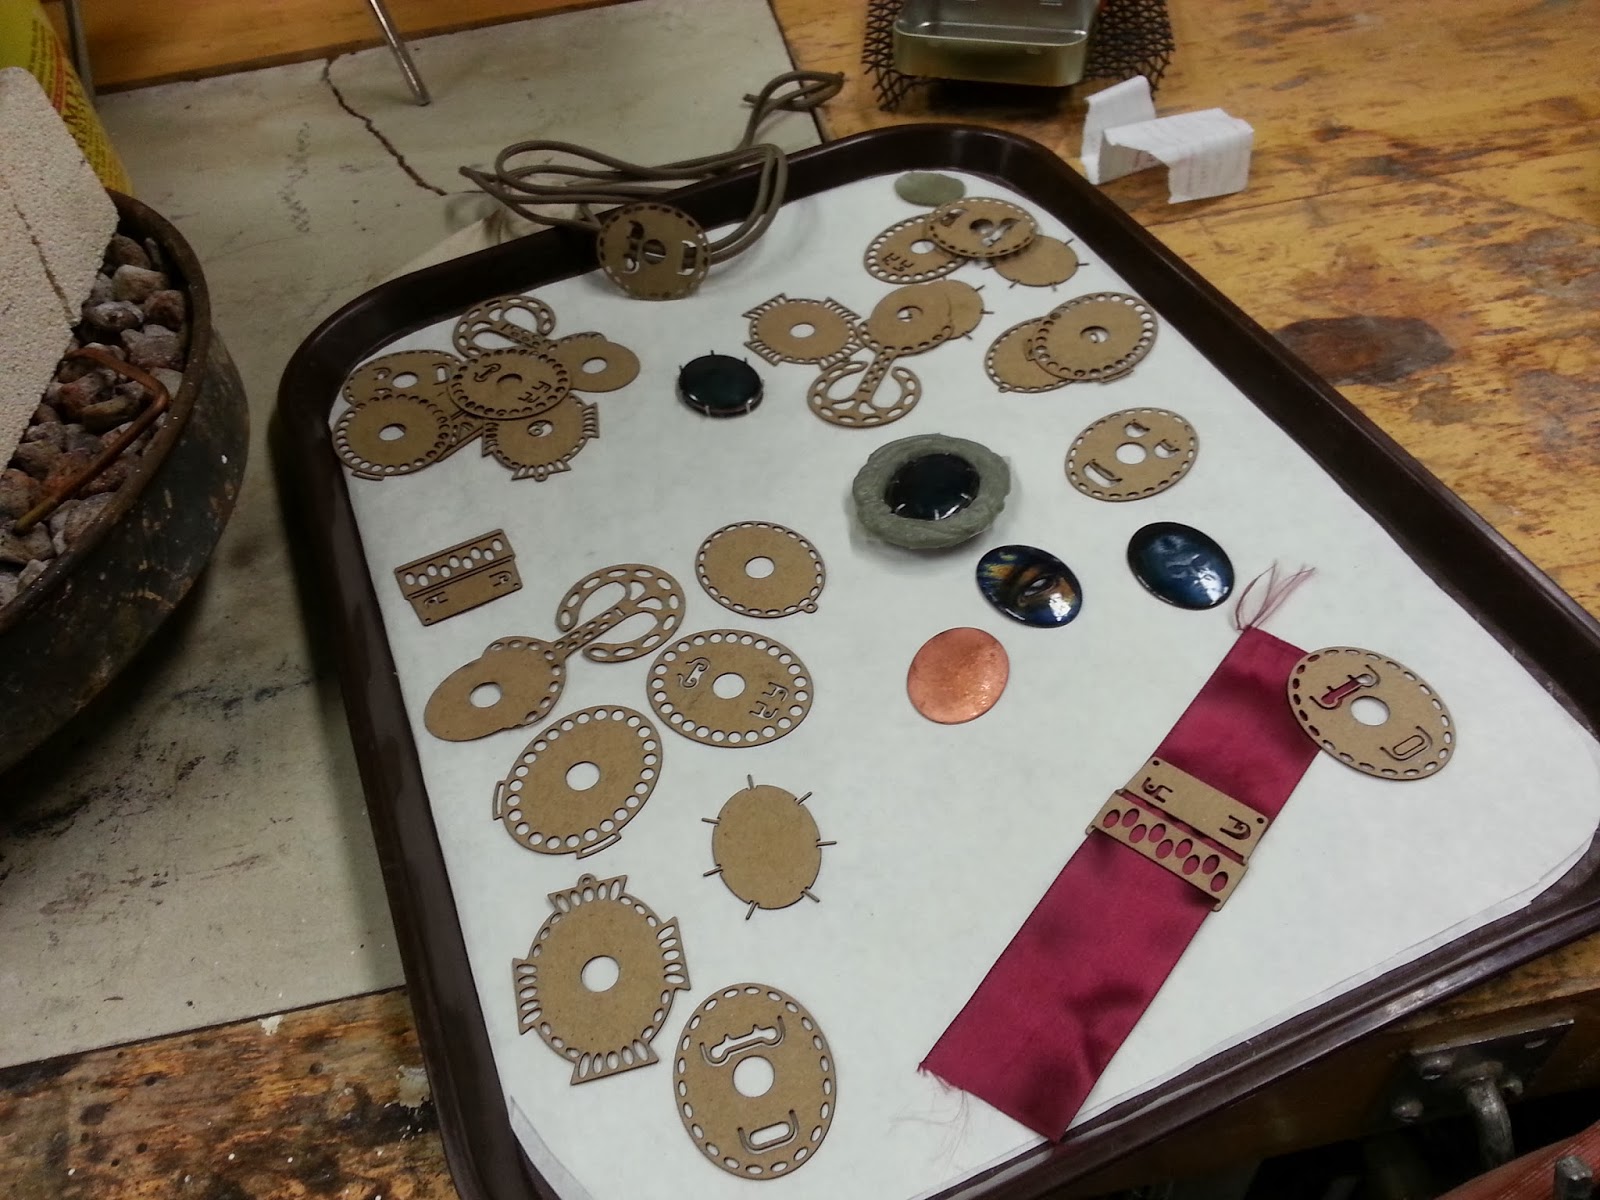
Pictured: a ton of custom shapes.
I was feeling pretty good about getting to understand the modeling program Rhino...then I had to use Adobe Illustrator and I remembered how INFURIATING computer programs can be when you don't know exactly what you are doing.
I did multiple laser-cut chipboard test runs so that I had something to experiment with.
Above: experimentation.
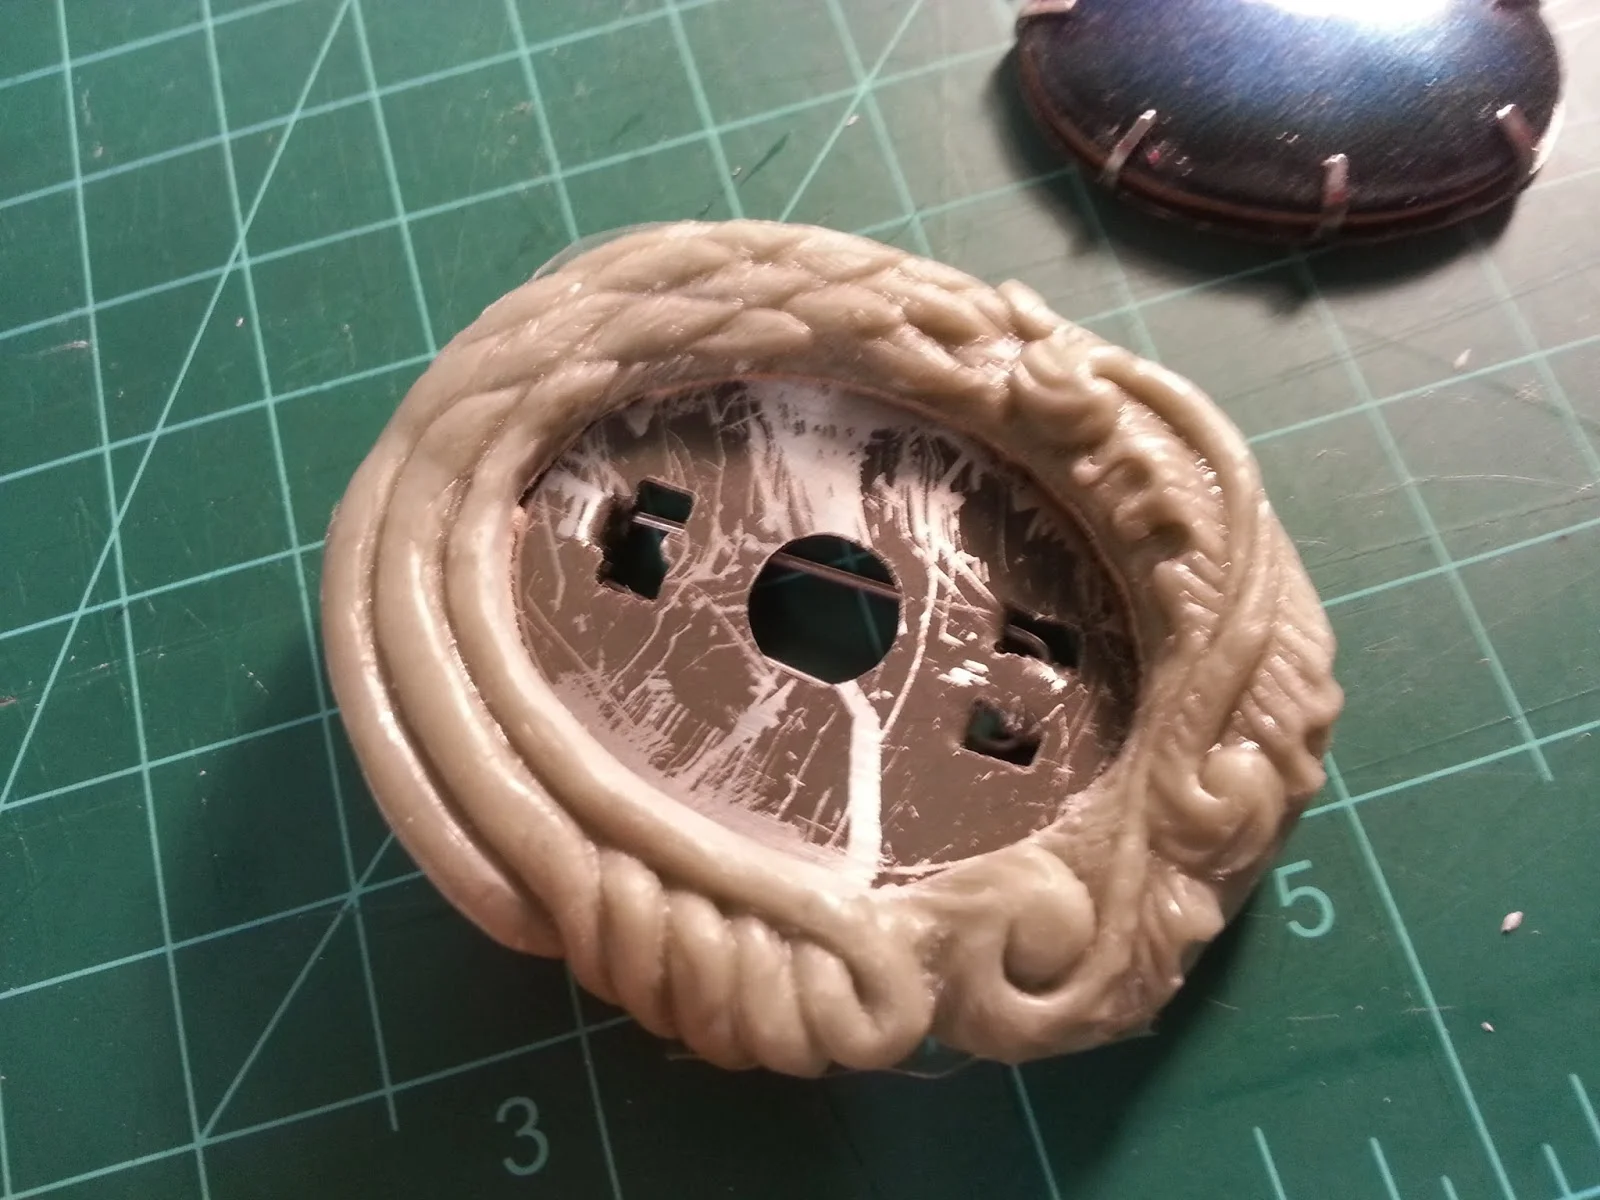
Each of the shapes I've made will be placed into a mold and have pewter cast around the edges, then the assorted tabs and cut-out areas are popped up to make the object function. I've got a brooch, a pin-on beribboned war medal, a pendant, a game piece, a choker/dual hung necklace, a bolo tie, and the actual pronged piece holding an enamel in place (a magnet under the enamel lets it clip to all of the other pieces, plus hey, a fridge magnet!). The holes around the edge of each piece allow the pewter to flow in and lock into place once cooled, and the center hole enables the user to pop the enamel out from behind.
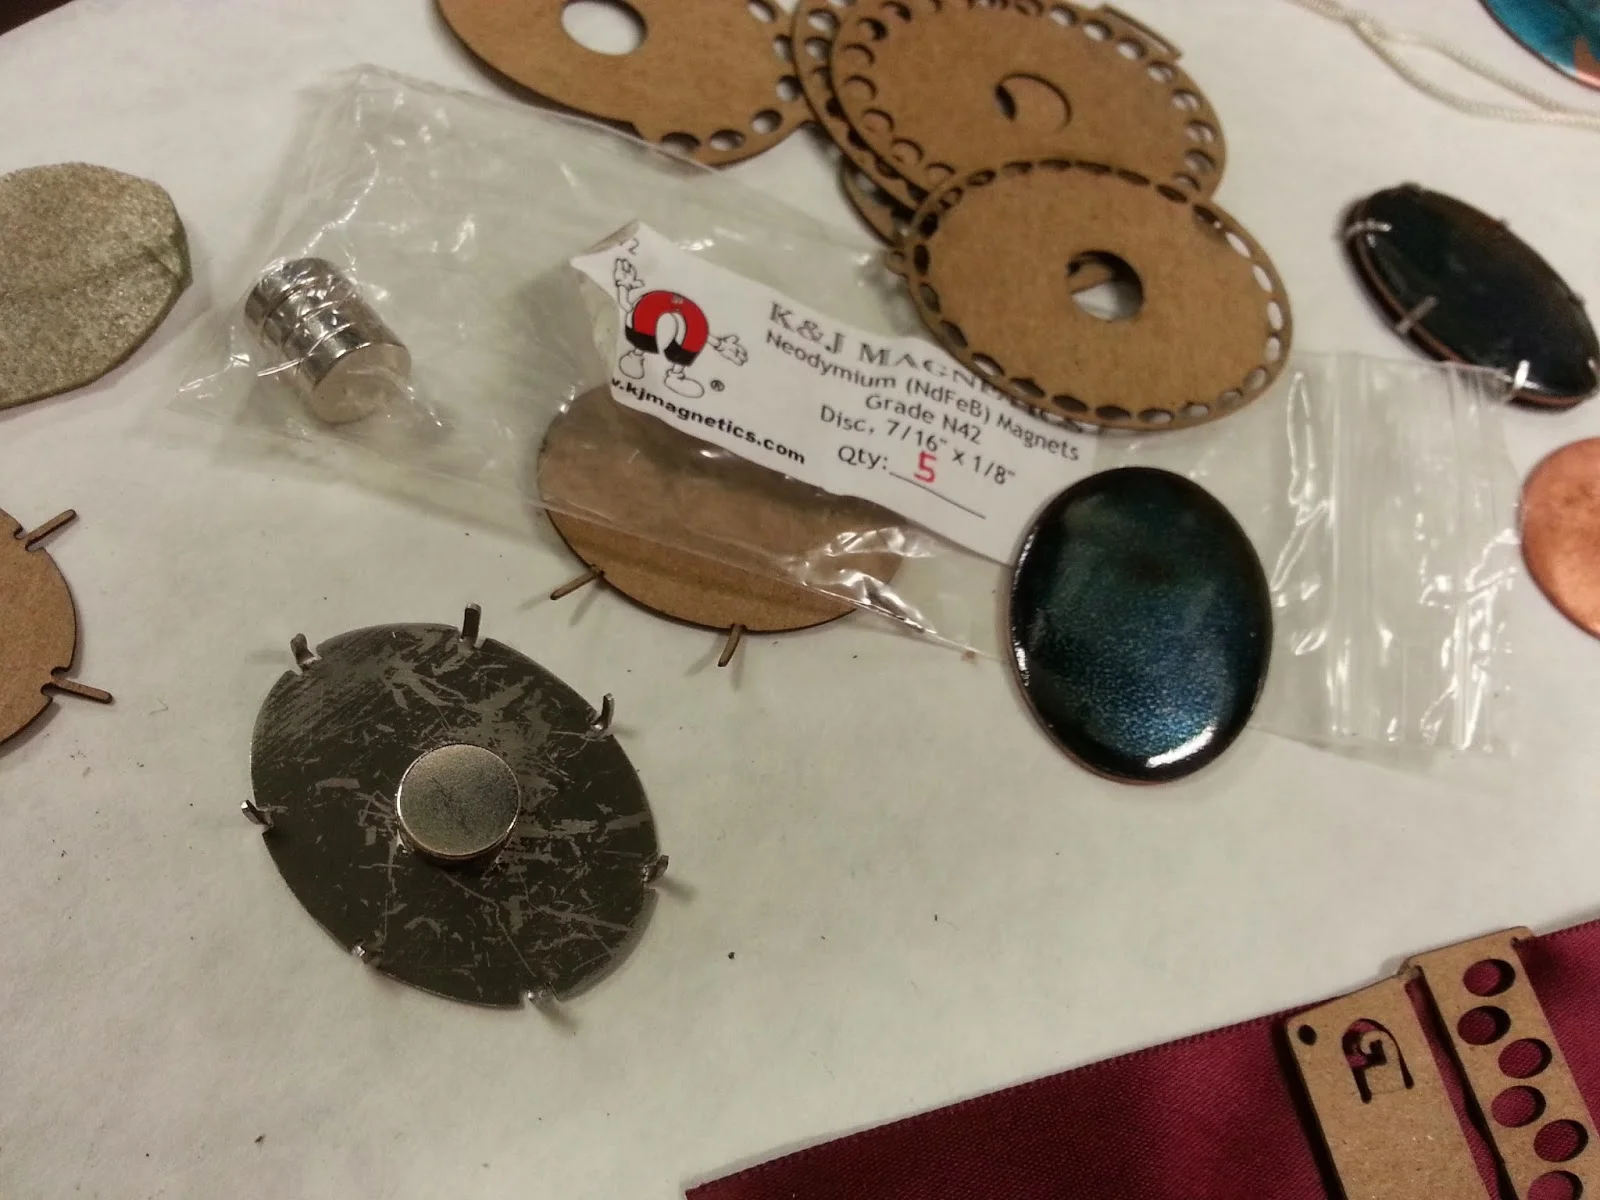
The dark green thing with the magnet is the steel; I spray painted it matte green and used the laser cutter to etch the pattern on and then cut it by hand with a jeweler's saw (the laser cutter I have access to isn't powerful enough to cut metal, but works great for putting on a precise pattern for layout).
Once I get the actual parts made from steel I will sculpt the master pattern for the pewter that will be used to make the mold for casting. Since I wanted to get a feel for what would happen and the overall effect, I decided to do a test sculpt using the chipboard.

Fresh from the laser cutter.
I didn't design them all until after I did the test I'm about to describe, but the recursive nature of testing makes for confusing blog posts when presented chronologically.
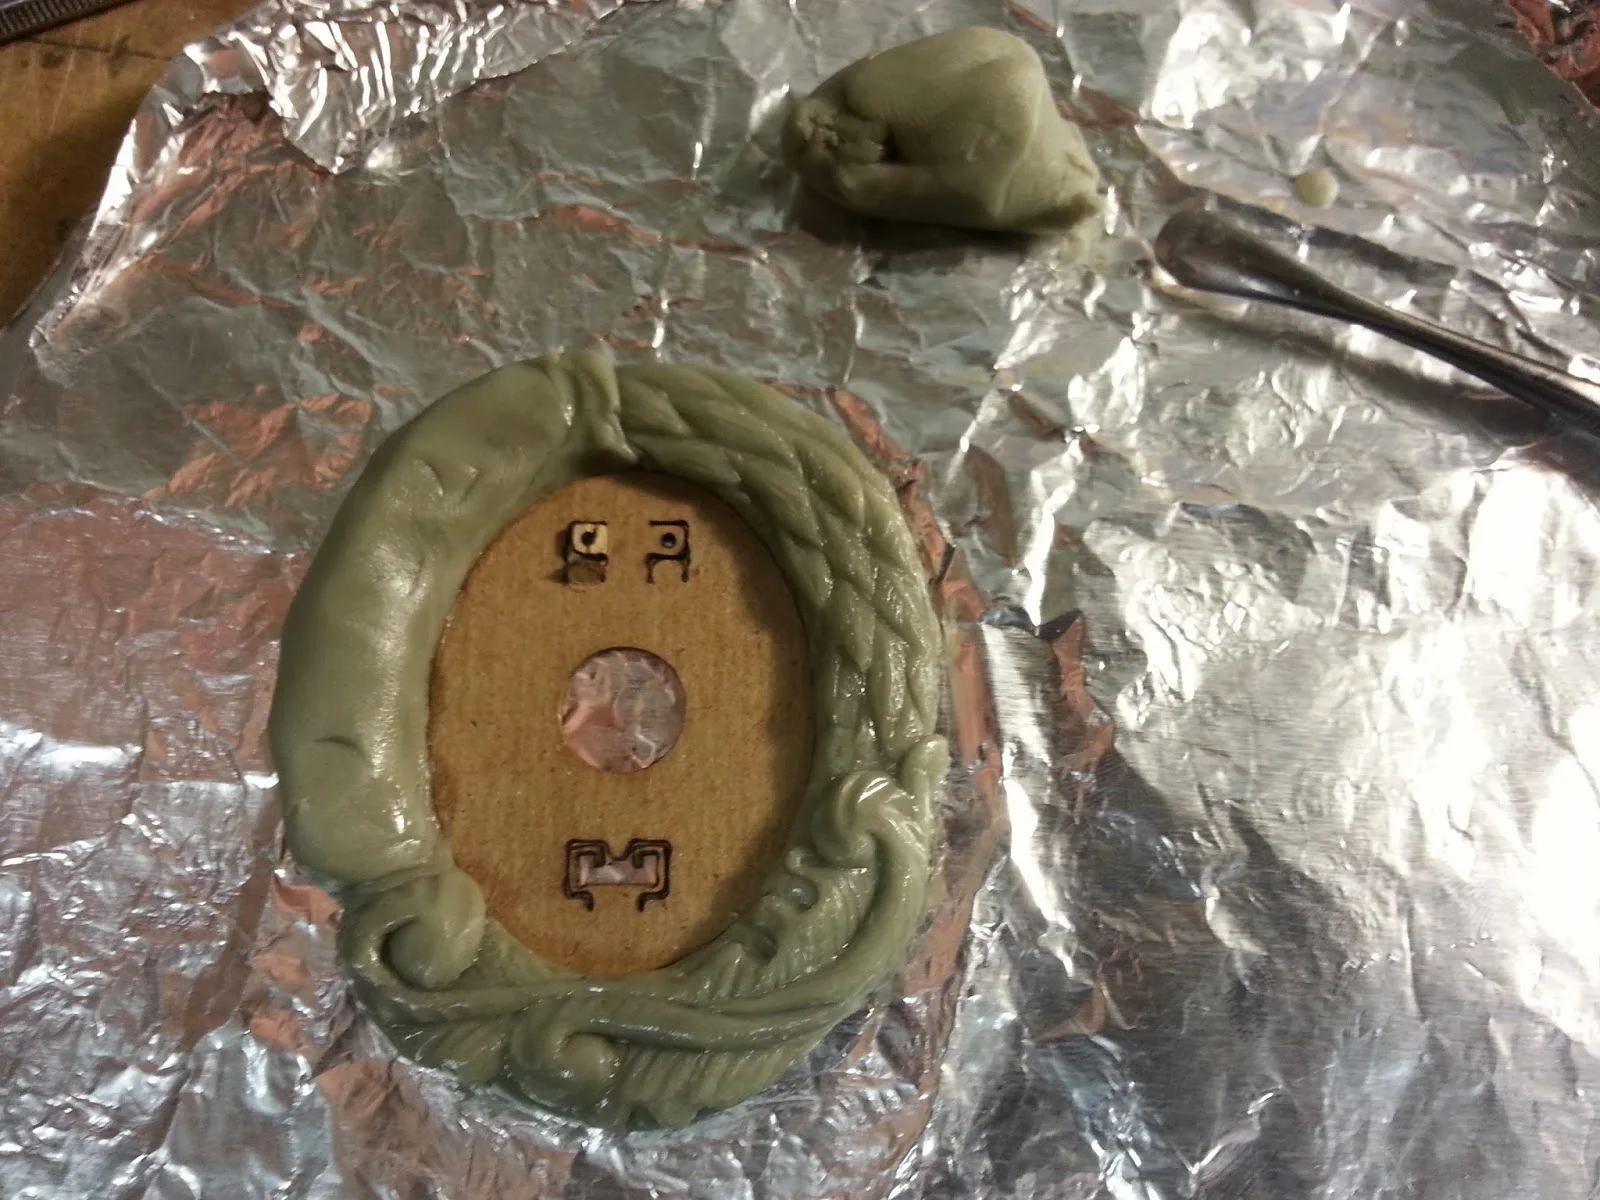
Two thirds done with the sculpting; I forgot to take an earlier photo.
The green stuff I'm using for sculpting is a two-part epoxy putty that sets up after a few hours. This is a pretty standard material for people sculpting toys, miniatures, and figurines, and it stands up to the vulcanization needed for the rubber molds used in spin casting. If you are familiar with Sculpey or Fimo, it is somewhat similar but requires no baking to cure. The type I'm using is called Apoxie Sculpt but I've also picked up Fixit, Green Stuff, Brown Stuff, and ProCreate. All of them are a little different and I need to play around a bit more before I figure out which is best for what.

Scalpels are really way, way better than Xacto knives.
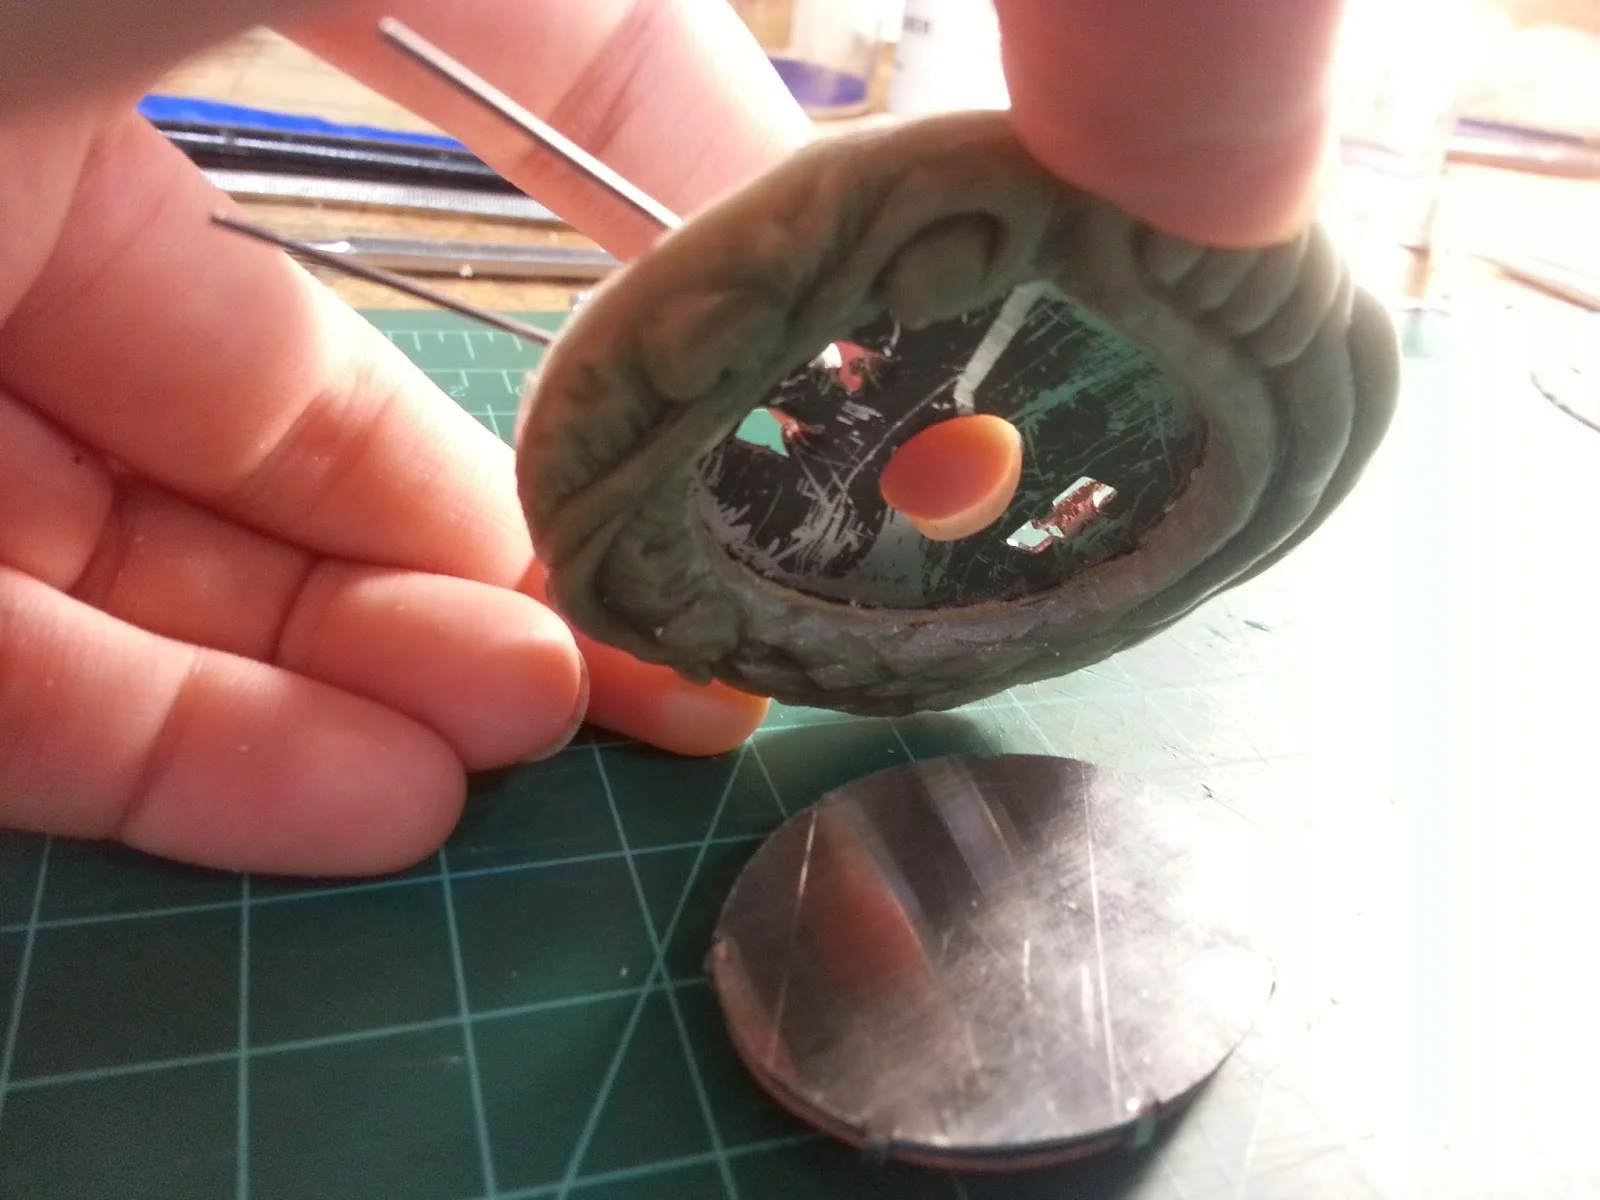
After letting the Apoxie cure overnight, I cut out the center of the chipboard and replaced it with a test cut of the steel so that I could see if the pin stem was placed appropriately and if the magnet I chose was effective.
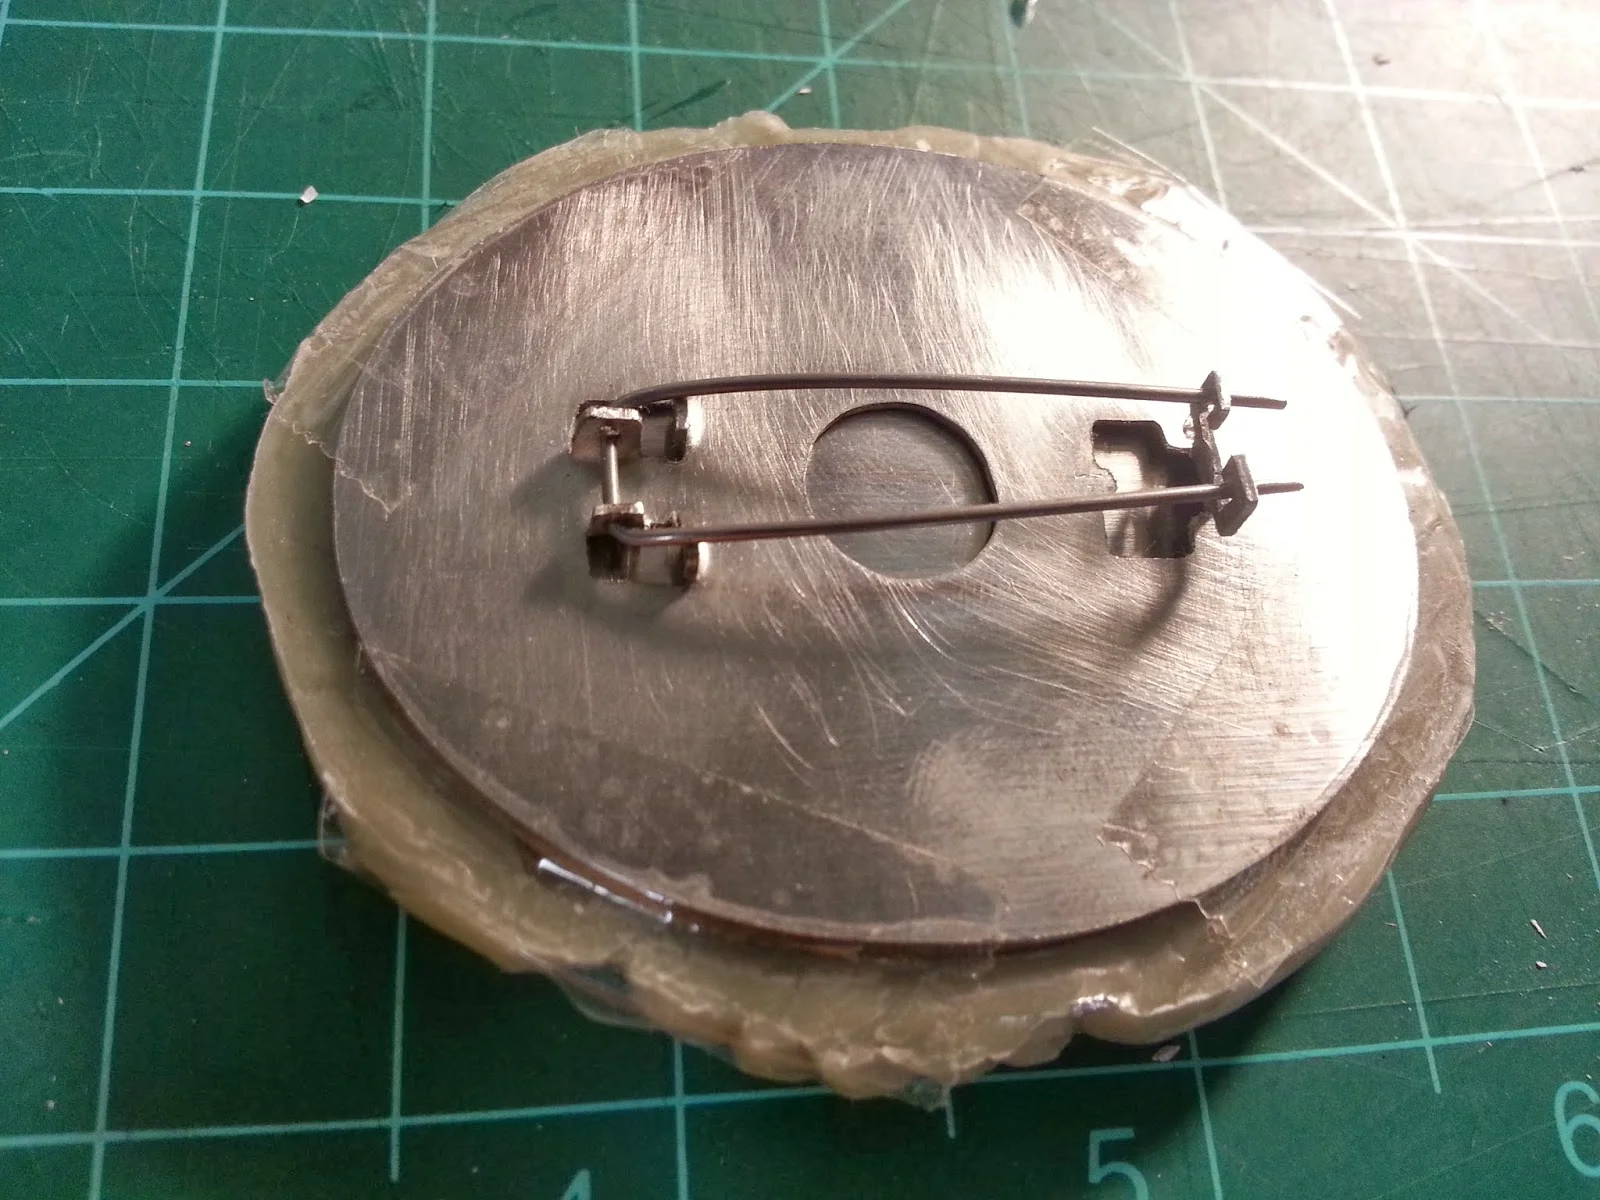
Popped-up pin back; after the test I opted to go with more rounded parts. And yes, that is scotch tape holding it together.
The enamel is in the background with the magnet between it and the pronged plate. A layer of silicone helps cushion it from shock. After seeing which magnet worked best I've gone back into the files and shortened the length of the prongs.
Plop.
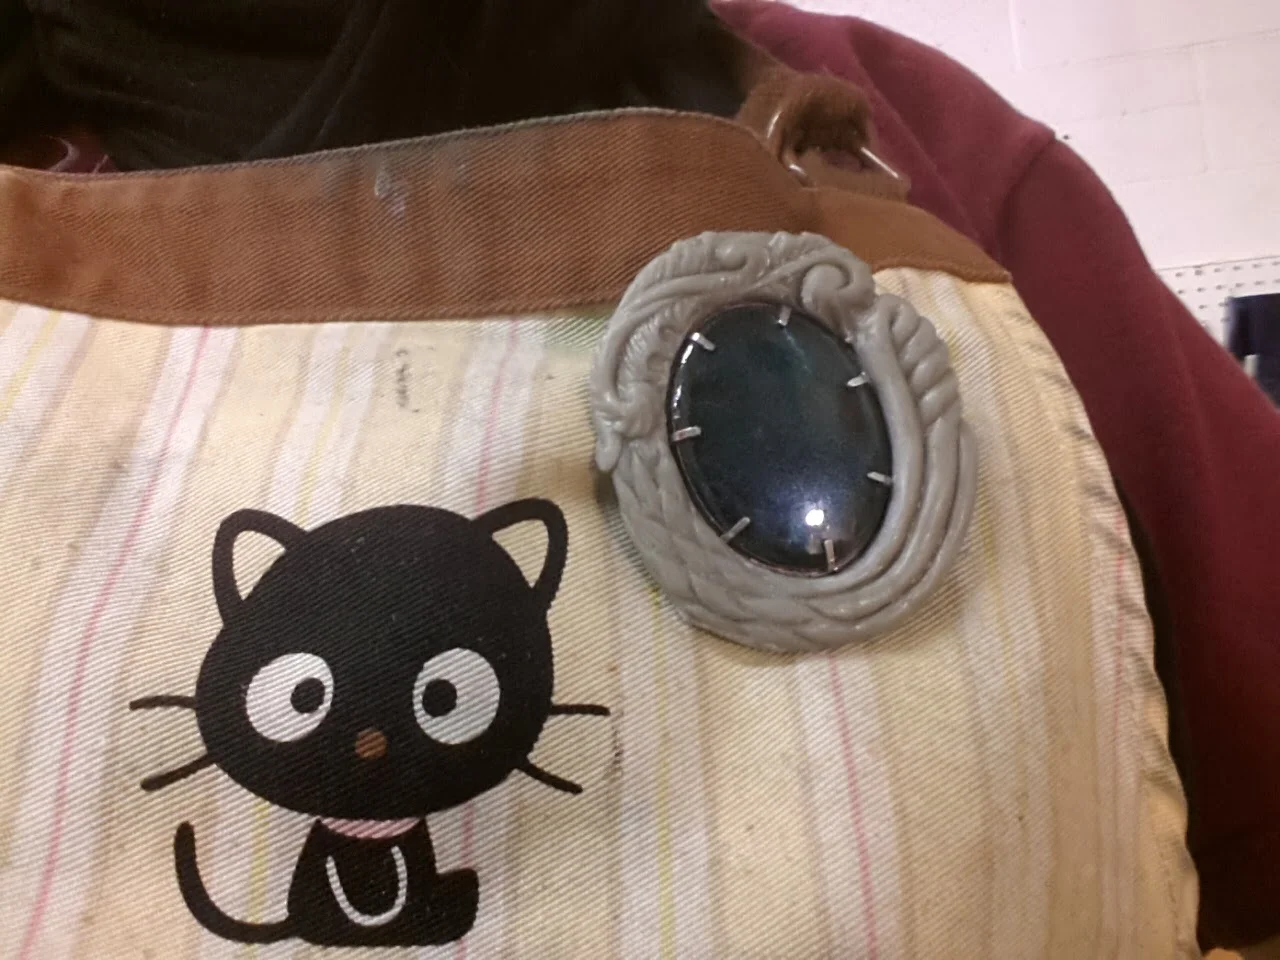
Ta-dah! A functioning prototype!
The cost of getting dies made to cut each of the shapes would be exorbitant, and laser cutting complex shapes gets pricey as well (plus the heat messes with the properties of steel and requires additional heat treatment post-cut to restore it), so I went looking for a different process. Enter photochemical machining, or PCM. It's an acid etch process requiring an etch-resistant film over areas you don't want to be removed, but rather than submerging the piece in acid or applying an acid paste the sheet of metal is suspended while acid is sprayed at it from both sides. Now, I have neither the equipment nor the expertise to do such a thing myself, but happily there are multiple on-demand shops which allow you to send them a file and they send you back the part. I've already put an order in with Great Lakes Engineering; we'll see what the parts look like when they ship later this month, but thus far their customer service has been excellent. They do some of the machining for the group Nervous System, so I'm definitely optimistic. Even if I did have to learn to use Illustrator to make the template they needed.
So. Much. Cursing.