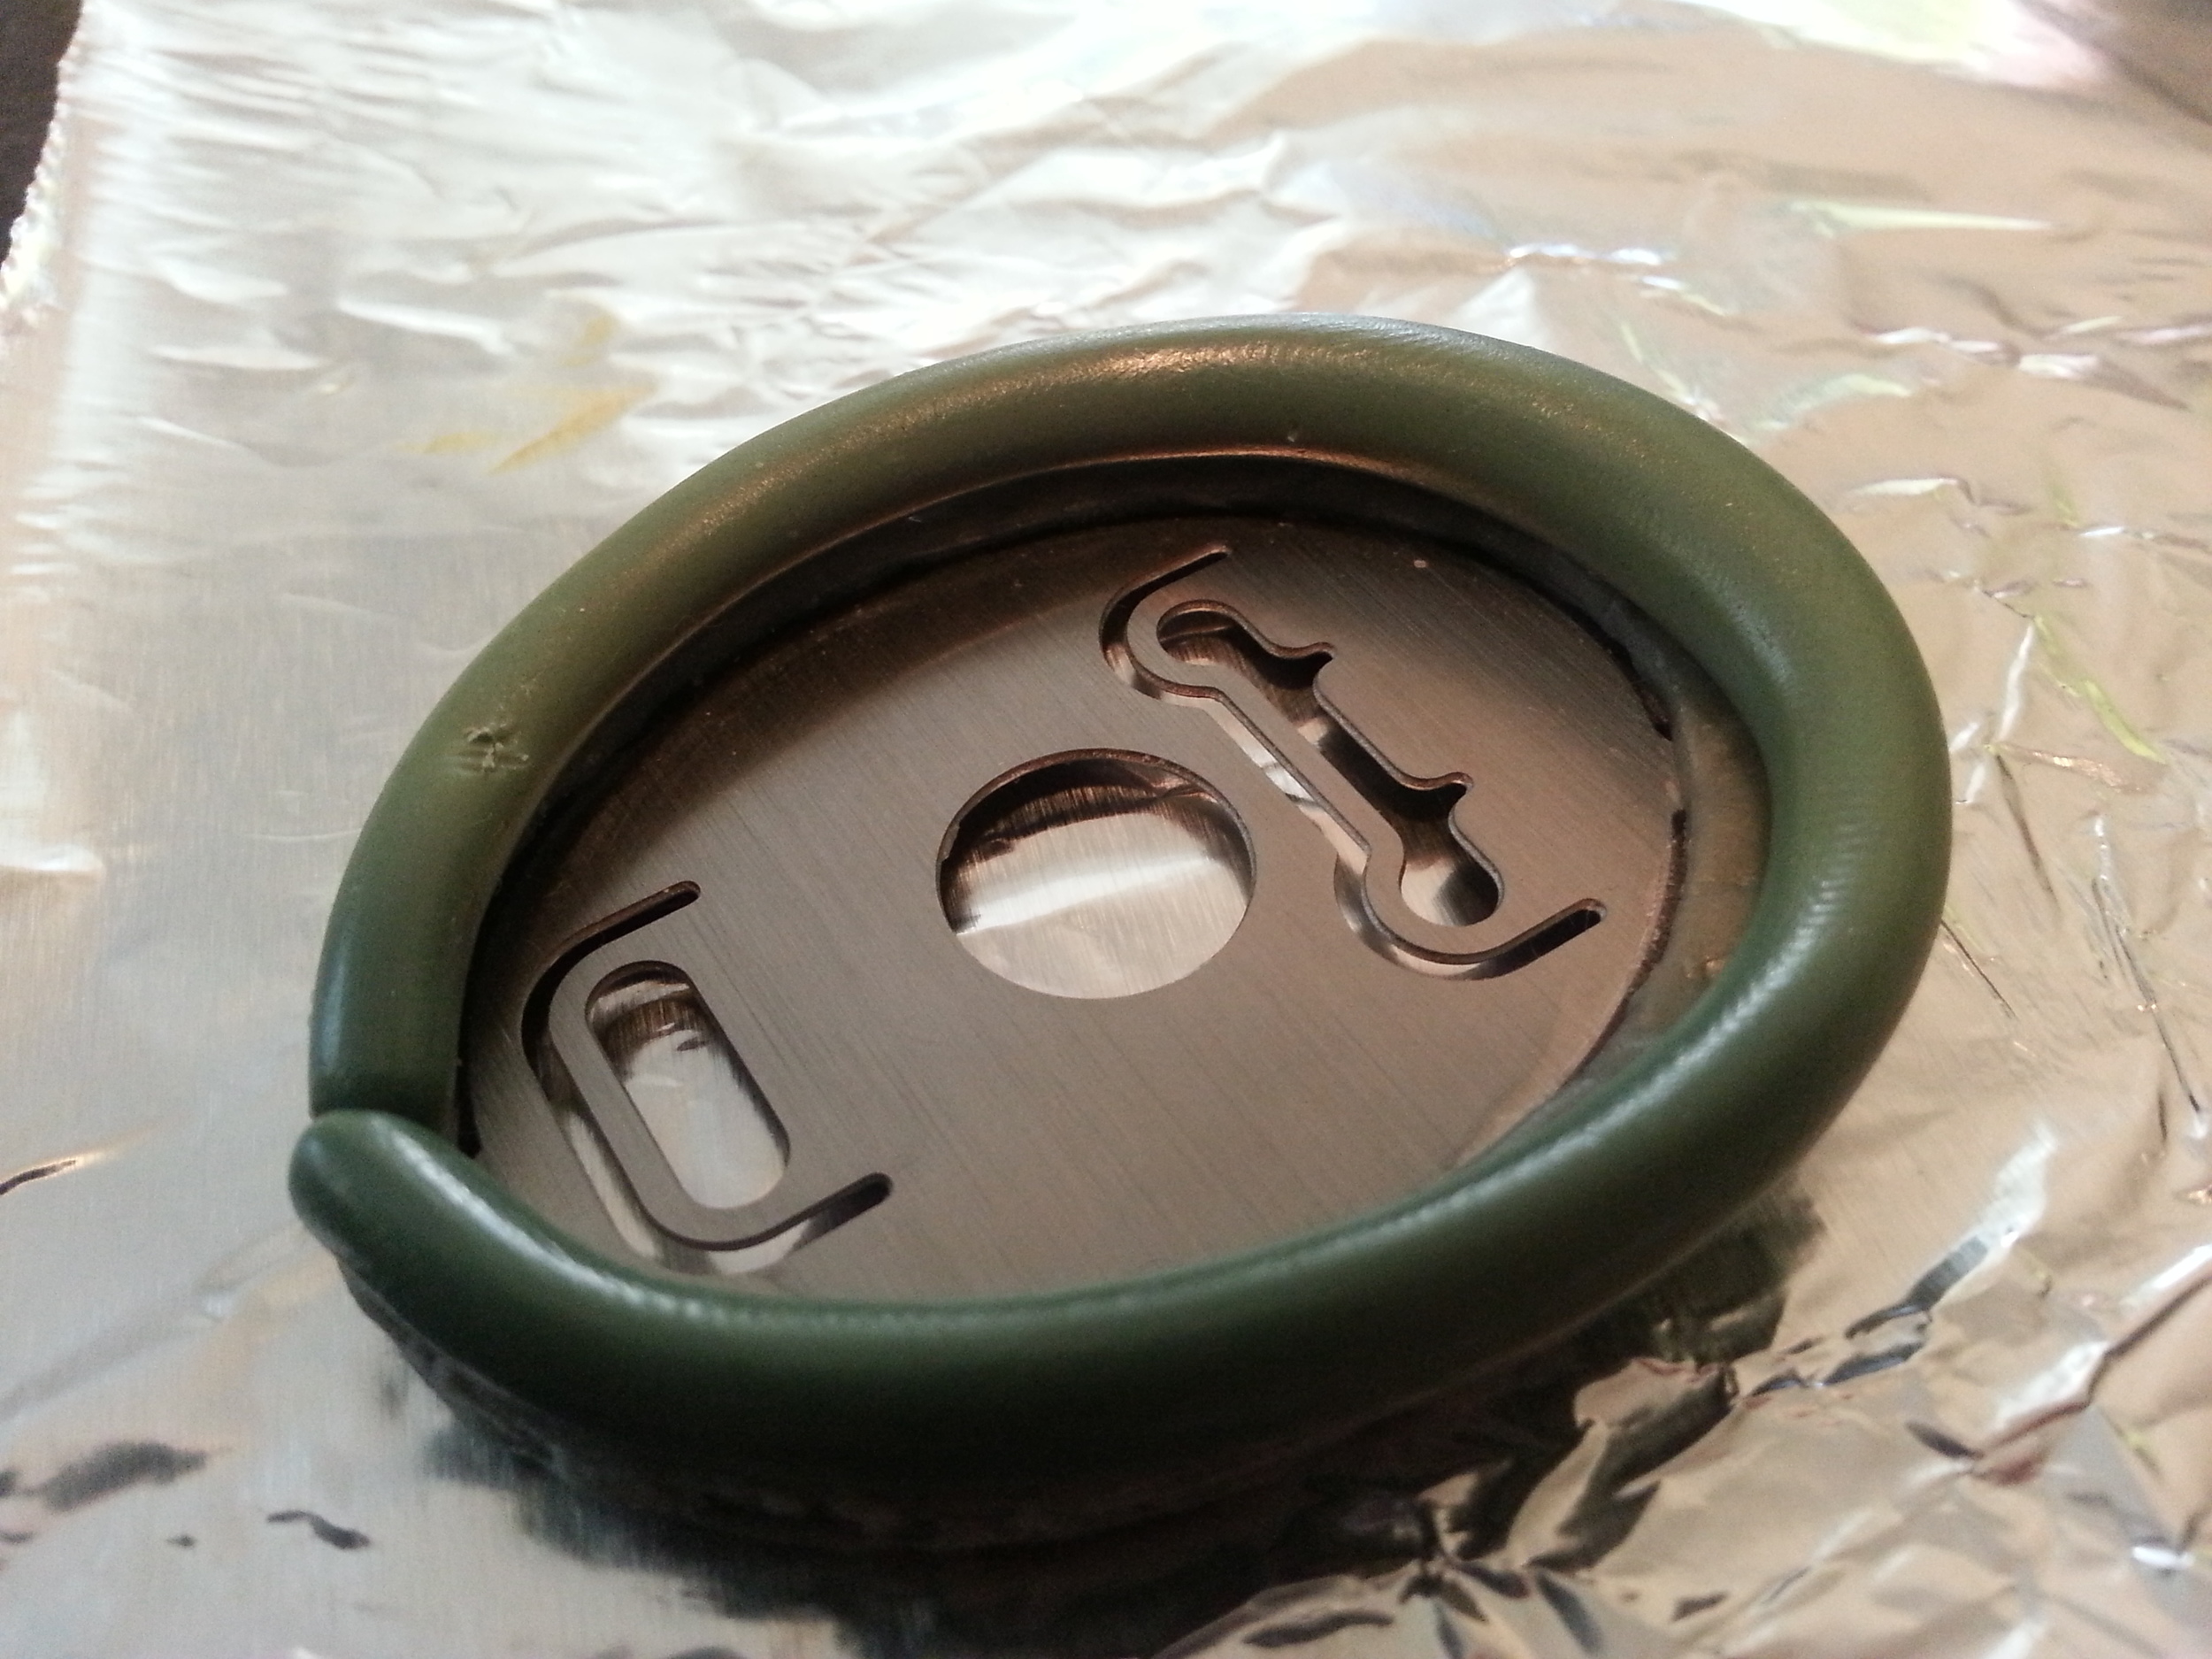
Hooray! My steel inserts came in the mail!! Great Lakes Engineering did an even better job than I had hoped. Behold:

Okay, it may not be exciting for you, but I'm just glad I didn't have to do all of that sawing.
Having done quite a bit of testing with laser cut chipboard and hand-cut prototypes, the finished pieces came out pretty well. A few changes are needed, but most everything works as planned.

This was the first time I'd hired someone to do an aspect of production for me, and I have to say, it ruled.
By bending up the tabs and adding some wire for pin stems, the bolo tie, pin backs, and prong settings all function. From here, it is just the slight detail of sculpting what will be cast in pewter. Also, by "slight detail" I mean "potentially enormous undertaking," but the time spent at this stage of production should mean a the settings can be produced at will when it's time to go.
Here's the process I went through sculpting the settings. As the pieces I'm making here will go through vulcanization, I've opted for an epoxy putty to make the masters for molding.

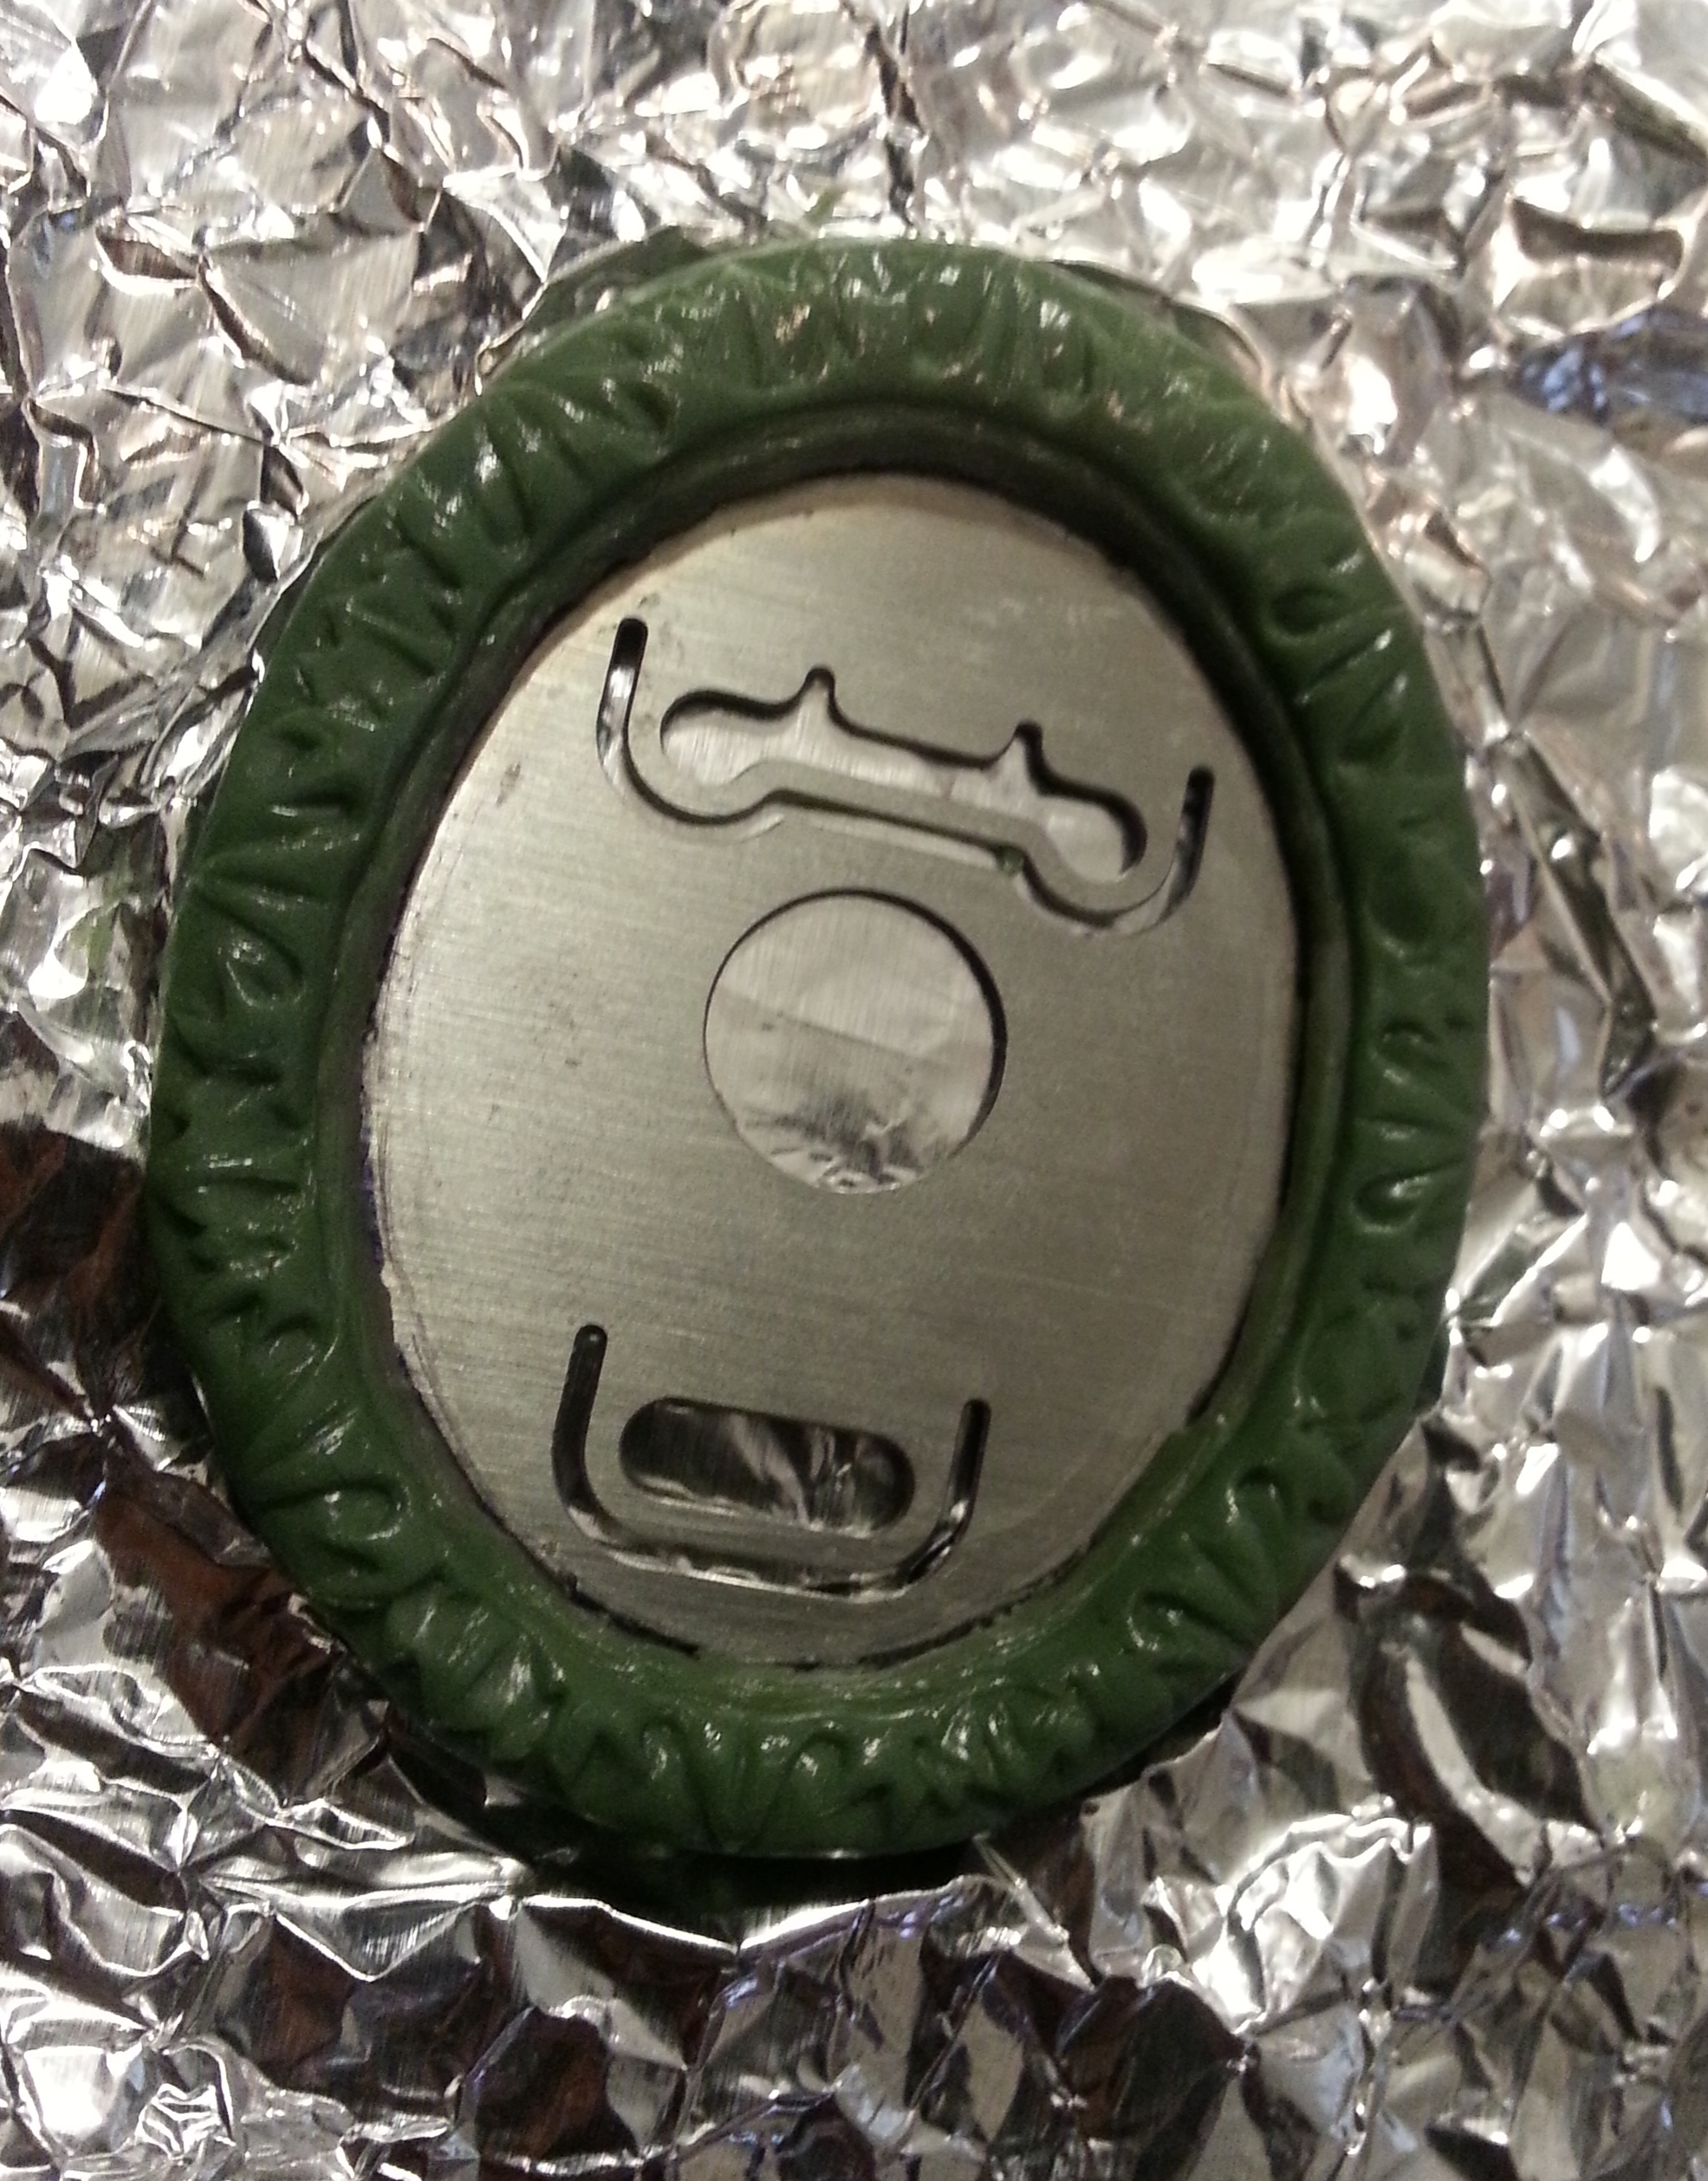
The pronged piece is for reference.

Leaving the edge bare let me keep an eye on thickness.
I started by putting down a layer of Apoxie Sculpt and letting it cure to provide a minimum thickness for the pewter areas and so that I didn't encroach on the area the enamel itself needs. During the sculpting process itself, the epoxy putty can be soft enough to distort and flatten from the pressure of shaping it. By allowing the Apoxie to cure, it forms a support layer and keeps the shape consistent.
Put down a nice, consistent later for the actual sculpting.

Started by firmly adhering the putty, then marking even sections.
Then comes the layer for the actual sculpting detail. The Apoxie doesn't take super fine detail, but I didn't care for the springiness of Green Stuff. A 50/50 mixure of the two products gave me the results I liked best.
I'd have more pictures of the sculpting process itself, but it turns out I use both hands to do it and can't take a picture at the same time. I pretty much just poke it with a pointy steel tool until it is where I want it. I don't carve or remove much material at this point as it is too soft, but when cured it can be filed and shaped quite well.
The sculpting is shiny both from being uncured and from my use of a water-based moisturizer to keep my steel tools lubricated. Without a little liquid on them, the putty tends to stick. You can use water with Green Stuff, but it makes a "mud" when used with Apoxie Sculpt. Oily lubricants have to be cleaned off very thoroughly or additional putty won't stick. Aves Studio's Safety Solvent is also a great option; I tend to use it alongside the lotion.

The blue, green, and gray bits at the front are the putties prior to mixing up. That's about the quantity I mix up at any given time, as the working period is about two hours before it starts getting too firm to easily sculpt.
I watched all of Eddie Murphy's movies on Netflix while working on these. The smell of epoxy putty will be forever linked with Axel Foley's laugh.
And here we have the cured pieces, all ready for molding. Hooray!